Side panels / Tools page
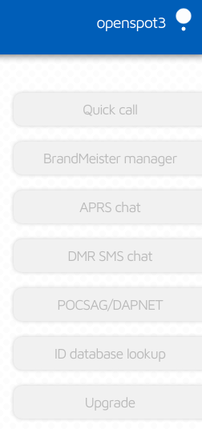
If you are using a computer, or a screen width enough width, the Tools page gets hidden and side panels will show up on the web interface. On small screens they are hidden, and their contents can be found on the Tools page.
Quick call
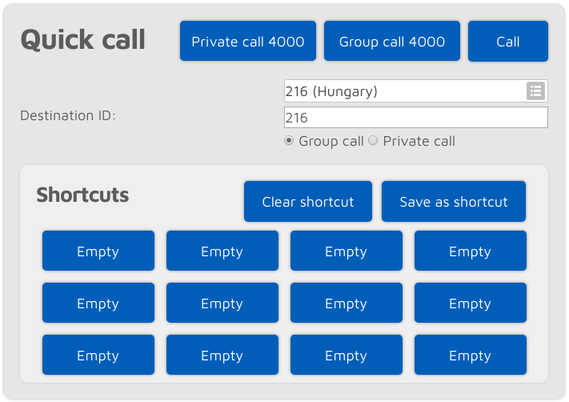
The quick call feature is available when the Homebrew/MMDVM® connector is active.
Reflector and talkgroup linking (and unlinking) is done by the network, not the openSPOT3. The openSPOT3 has to make quick calls, which are the same as pressing PTT for a short time on a radio (kerchunking). These empty calls will also show up on the BrandMeister Network's dashboard.
Quick call is useful for linking/unlinking talkgroups and reflectors. Starting a short private call to a reflector ID (between 4000 and 5000) will link the reflector. Starting a short group call to a talkgroup ID will link that TG. On the BrandMeister network, reflectors are unlinked by starting a private call to ID 4000, and both reflectors and talkgroups are unlinked by starting a group call to ID 4000.
Quick call shortcuts can be stored in the openSPOT3's current configuration profile. If you hover the mouse cursor over a saved talkgroup's button, or the button is pressed for a few seconds then the (BrandMeister) talkgroup's name will appear.
If the Auto group call 4000 before shortcut call checkbox is checked, then the openSPOT3 will automatically start a quick call to TG4000 to unlink everything before quick calling the desired ID.
BrandMeister Manager
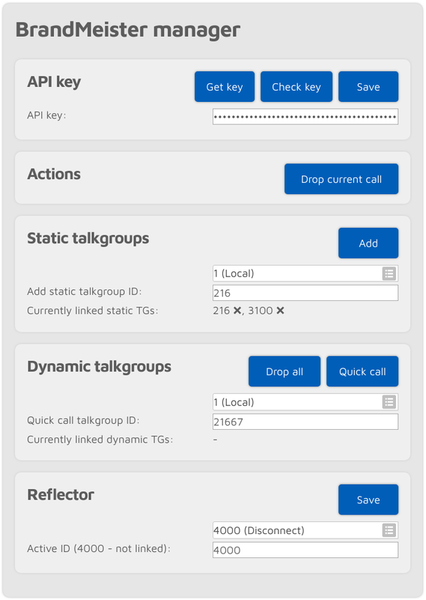
The BrandMeister Manager (BMM) is available when the Homebrew connector is active, and it is configured for a BrandMeister server. With BMM, you can link/unlink static and dynamic talkgroups, and you can interrupt the currently ongoing call.
A BrandMeister API key is needed to use the BMM. You can get the API key by clicking on the Get key button, and logging into the BrandMeister SelfCare. Copy and paste the API key to the API key input field and click on the Save button. The API key's validity can be checked by clicking on the Check key button.
Note that only BrandMeister API v1 keys are stored in the openSPOT3. v2 keys are stored by your browser.
DMR SMS chat
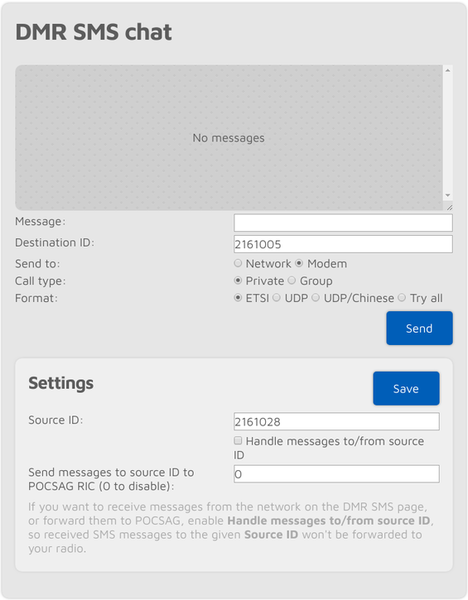
This feature is available when the modem is in DMR mode, or the currently active connector supports DMR SMS sending.
Sent messages are displayed on the right, received messages are displayed on the left of the chat box. You can click on each message for additional information.
The modem radio button is disabled if the modem is not in DMR mode. Messages sent to openSPOT3's DMR echo ID (it's 9999 by default) will be echoed back to the sender. Note that the openSPOT3 only stores the last received message, so you have to keep open this page in your browser to receive more than one message at once.
Use ETSI format if you want to send a message to Hytera radios, UDP format for Motorola radios, and UDP/Chinese format for other Chinese radios (Tyt, Retevis, etc.).
If you want to receive messages from the network on the DMR SMS page, you have to check the Handle messages to/from source ID checkbox. If it's enabled, received SMS messages to the given Source ID won't be forwarded to your radio.
If you want to send received DMR SMS messages as POCSAG messages, check the Handle messages to/from source ID checkbox, and set a POCSAG RIC to send messages to.
You can simply use the ETSI format if you want to send messages through the network. Note that the network must know about the location of your Source ID. If you want to receive DMR SMS messages from the network, you have to set the Source ID to the DMR ID you set at the connector settings, or if you want to use another ID, then you have to start a short call from that DMR ID with your radio, so the network will know that your custom DMR ID can be reached through this openSPOT3.
POCSAG/DAPNET
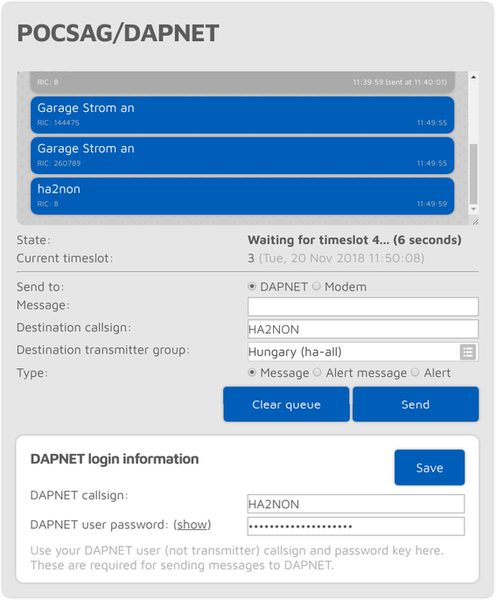
You can see the POCSAG message queue here. Queued unsent messages are displayed with a blue background, sent messages are gray. All messages receveid from DAPNET or sent from this interface are first placed in the POCSAG message queue.
Note that the displayed current timeslot number and time is calculated by the browser and is not equal to the openSPOT3's internal device time and timeslot framing which is more precise.
If the Send to radio button is set to Modem then you can directly add messages to the queue which will be transmitted by the openSPOT3.
If you want to send a message to DAPNET, you have to set your DAPNET user callsign and user password first. Note that these have to be the DAPNET user callsign and password, not the transmitter callsign and auth key you've set for the DAPNET connector. Multiple destination callsigns and transmitter groups can also be specified in a comma separated list.
DAPNET messages are sent by your browser to the DAPNET API. Note that sometimes the DAPNET API server does not respond to message send requests and times out, but correctly processes received messages.
APRS® chat
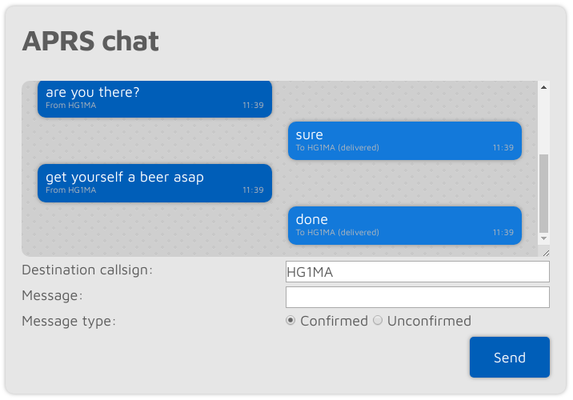
You can send and receive messages via the APRS® network. This feature is available when the APRS® connector is enabled.
Sent messages are displayed on the right, received messages are displayed on the left of the chat box. The openSPOT3 stores the last 10 messages in its internal memory, so you can receive messages even if the web interface is not open. You'll get a notification about unread messages if you open the web interface. If you reboot the device then all stored messages will be lost.
Confirmed messages need to be acknowledged by the recipient. If the recipient is unavailable (which means no acknowledge is received for a specific time), then the openSPOT3 retries sending a few times before the message send times out. You can cancel the confirmed message send by clicking on the Cancel button.
If a message bubble is clicked then its callsign will be set as the message send destination callsign.
ID database lookup
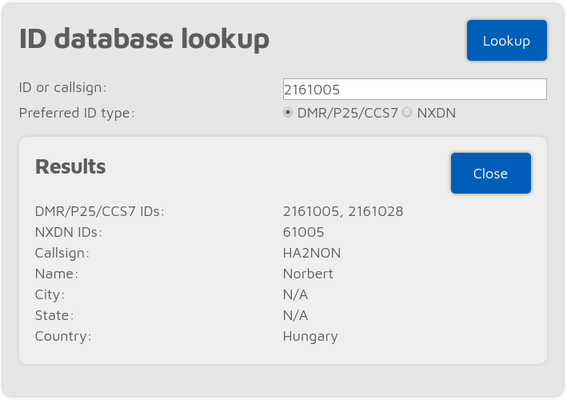
You can look up IDs or callsigns and display information about them. The lookup will be done through the network if the openSPOT3 has not downloaded a valid ID database.
If the Auto match ID and callsign fields checkbox is checked, then all callsigns and IDs will be matched when saving connector settings, and a warning will be displayed if the entered callsign does not match the entered ID according to the database. This is to prevent typos or invalid IDs when trying to connect to a network, as most servers do not allow connections with invalid IDs or callsigns.
Upgrade
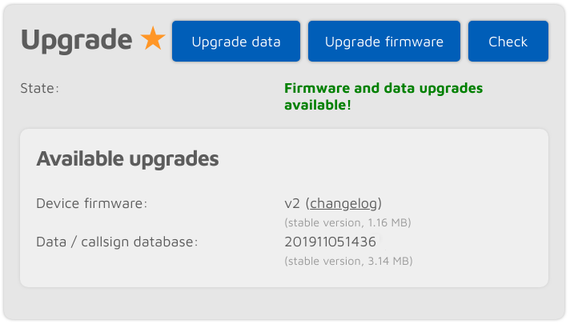
Information about firmware and data upgrades are displayed here. You can also request an immediate upgrade availability check, and manually start the upgrade process if auto upgrades are disabled on the Settings page, Firmware upgrade section.
Note that you have to plug the openSPOT3 into a USB power supply, otherwise the bootloader can't start and the firmware will not be upgraded.
Do NOT unplug the openSPOT3 during a firmware upgrade!